

How to create an image slider
Creating an image slider using JavaScript involves manipulating the DOM to display different images and adding navigation controls to switch between them. Here's an example of how you can create a simple image slider:
1. Set up your HTML structure:
<!Doctype html>
<html>
<head>
  <title>Image Slider Example</title>
  <link rel="stylesheet" href="styles.css">
</head>
<body>
  <div class="slider">
    <div class="slider-container">
      <img src="image1.jpg" alt="Image 1">
      <img src="image2.jpg" alt="Image 2">
      <img src="image3.jpg" alt="Image 3">
    </div>
    <button class="slider-button prev">Prev</button>
    <button class="slider-button next">Next</button>
  </div>

  <script src="script.js"></script>
</body>
</html>
2. Create a CSS file (styles.css) to style the image slider:
css
.slider {
  position: relative;
  width: 100%;
  max-width: 600px;
  margin: 0 auto;
}

.slider-container {
  display: flex;
  overflow: hidden;
}

.slider-container img {
  width: 100%;
  height: auto;
  object-fit: cover;
}

.slider-button {
  position: absolute;
  top: 50%;
  transform: translateY(-50%);
  padding: 10px;
  background-color: #fff;
  border: none;
  cursor: pointer;
}

.slider-button.prev {
  left: 10px;
}

.slider-button.next {
  right: 10px;
}
3. Now, create a JavaScript file (script.js) to handle the image slider functionality:
javascript
document.addEventListener('DOMContentLoaded', function () {
  const sliderContainer = document.querySelector('.slider-container');
  const sliderImages = sliderContainer.querySelectorAll('img');
  const prevButton = document.querySelector('.slider-button.prev');
  const nextButton = document.querySelector('.slider-button.next');

  let currentIndex = 0;
  const maxIndex = sliderImages.length - 1;

  function showImage(index) {
    sliderImages.forEach((image, i) => {
      image.style.transform = `translateX(${100 * (i - index)}%)`;
    });
  }

  function nextImage() {
    currentIndex = (currentIndex + 1) % (maxIndex + 1);
    showImage(currentIndex);
  }

  function prevImage() {
    currentIndex = currentIndex === 0 ? maxIndex : currentIndex - 1;
    showImage(currentIndex);
  }

  // Add click event listeners to the navigation buttons
  nextButton.addEventListener('click', nextImage);
  prevButton.addEventListener('click', prevImage);

  // Show the first image by default
  showImage(currentIndex);
});
4. Place all the files (HTML, CSS, and JS) in the same folder, and replace the `src` attribute of the `<img>` tags with the actual paths to your images.
Open the HTML file in a web browser, and you should see the image slider with navigation buttons. Clicking the "Next" button will show the next image, and clicking the "Prev" button will show the previous image. The images will transition smoothly using CSS transforms.
You can add more images by duplicating the `<img>` tags inside the `.slider-container` div and updating their `src` and `alt` attributes. The JavaScript code will handle the rest automatically.
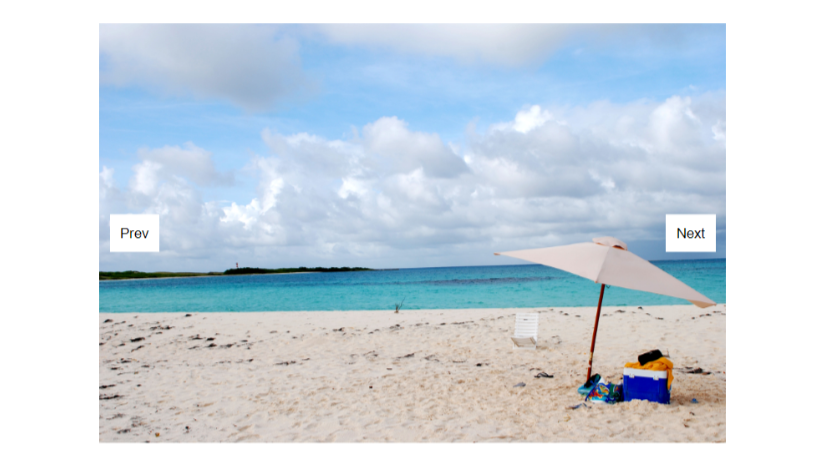
Output:
About the Author

Silan Software is one of the India's leading provider of offline & online training for Java, Python, AI (Machine Learning, Deep Learning), Data Science, Software Development & many more emerging Technologies.
We provide Academic Training || Industrial Training || Corporate Training || Internship || Java || Python || AI using Python || Data Science etc


PreviousNext
Join our newsletter for the latest updates.
About us
Our Services
Contact Us
Our Courses
Learn Python | Learn AI | Learn Machine Learning | Learn Deep Learning | Learn Core Java | Learn Java JSP | Learn Java Servlet | Learn Java Spring Core | Learn Spring Boot | Learn Power BI | Learn DAA | Learn HTML | Learn SQL | Learn C Programming | Learn Bootstrap | Learn Git | Learn JavaScript | Learn Data Structure Using C | Learn RDBMS | Learn Data Science | Learn PHP
Our Tutorials
Python Tutorial | AI Tutorial | Machine Learning Tutorial | Deep Learning Tutorial | Core Java Tutorial | Java JSP Tutorial | Java Servlet Tutorial | Java Spring Tutorial | Spring Boot Tutorial | Power BI Tutorial | DAA Tutorial | HTML Tutorial | SQL Tutorial | C Programming Tutorial | Bootstrap Tutorial | Git Tutorial | JavaScript Tutorial | Data Structure Using C Tutorial | RDBMS Tutorial | Data Science Tutorial | PHP Tutorial
Copyright © 2023 Pythontpoint Powered by Silan Software Pvt. Ltd. All rights reserved.