

JAVA Spring Boot Application for generating QR Code
In this Article, we will walk you through the steps to generate a QR code using Spring Tool Suite. QR codes are two-dimensional barcodes that can be easily scanned by smartphones and other devices, providing a quick way to share information or access online content. We will provide the necessary code and instructions to create a QR code generator application using the Spring Boot framework.
Prerequisites:
Before proceeding, ensure that you have the following:
Spring Tool Suite (STS) or any other preferred IDE installed.
Java Development Kit (JDK) installed.
Basic knowledge of Java and Spring Boot.
Step 1: Create a Spring Boot Project
Open Spring Tool Suite.
Click on "File" -> "New" -> "Spring Starter Project."
Enter a project name, such as "spring-boot-QR-code."
Set the Group and Artifact IDs accordingly.
Choose the desired Java version17.
Click "Next" and select "Web" from the list of dependencies.
Click "Finish" to create the project.
Step 2: Add Dependencies
1.spring web
2. core image dependency
3.java client dependency
Open the pom.xml file in your Project:-
Add the following dependencies within the <dependencies> section:
Pom.xml:-
<dependency>
    <groupId>org.springframework.boot</groupId>
    <artifactId>spring-boot-starter-web</artifactId>
</dependency>
<dependency>
    <groupId>com.google.zxing</groupId>
    <artifactId>core</artifactId>
    <version>3.4.0</version>
</dependency>
<dependency>
    <groupId>com.google.zxing</groupId>
    <artifactId>javase</artifactId>
    <version>3.4.0</version>
</dependency>
Step 3: Create QRCodeController Class
Create a new Java class called QRCodeController.
Add the following code to the class:

package com.example.demo;

import org.springframework.http.HttpStatus;
import org.springframework.http.ResponseEntity;
import org.springframework.web.bind.annotation.GetMapping;
import org.springframework.web.bind.annotation.PathVariable;
import org.springframework.web.bind.annotation.RestController;

@RestController
public class QRCodeController {
    private static final String QR_CODE_IMAGE_PATH = "./src/main/resources/QRCode.png";

    @GetMapping(value = "/generateAndDownloadQRCode/{codeText}/{width}/{height}")
    public void download(
    @PathVariable("codeText") String codeText,
    @PathVariable("width") Integer width,
    @PathVariable("height") Integer height)
    throws Exception {
        QRCodeGenerator.generateQRCodeImage(codeText, width, height, QR_CODE_IMAGE_PATH);
    }

    @GetMapping(value = "/generateQRCode/{codeText}/{width}/{height}")
    public ResponseEntity<byte[]> generateQRCode(
    @PathVariable("codeText") String codeText,
    @PathVariable("width") Integer width,
    @PathVariable("height") Integer height)
    throws Exception {
        return ResponseEntity.status(HttpStatus.OK).body(QRCodeGenerator.getQRCodeImage(codeText,
        width, height));
    }
}
Step 4: Create QRCodeGenerator Class

Create a new Java class called QRCodeGenerator.
Implement the QR code generation logic within this class.java
Copy code
package com.example.demo;

import java.awt.image.BufferedImage;
import java.io.ByteArrayOutputStream;
import javax.imageio.ImageIO;
import com.google.zxing.BarcodeFormat;
import com.google.zxing.common.BitMatrix;
import com.google.zxing
Step 4 (continued): Create QRCodeGenerator Class
2. Implement the QR code generation logic within this class.java

Copy code
package com.example.demo;

import java.awt.image.BufferedImage;
import java.io.ByteArrayOutputStream;
import javax.imageio.ImageIO;
import com.google.zxing.BarcodeFormat;
import com.google.zxing.common.BitMatrix;
import com.google.zxing.qrcode.QRCodeWriter;

public class QRCodeGenerator {

    public static byte[] getQRCodeImage(String codeText, int width, int height) throws Exception {
        QRCodeWriter qrCodeWriter = new QRCodeWriter();
        BitMatrix bitMatrix = qrCodeWriter.encode(codeText, BarcodeFormat.QR_CODE, width, height);

        BufferedImage qrCodeImage = new BufferedImage(width, height, BufferedImage.TYPE_INT_RGB);
        qrCodeImage.createGraphics();

        for (int x = 0; x < width; x++) {
            for (int y = 0; y < height; y++) {
                qrCodeImage.setRGB(x, y, bitMatrix.get(x, y) ? 0x000000 : 0xFFFFFF);
            }
        }
        ByteArrayOutputStream outputStream = new ByteArrayOutputStream();
        ImageIO.write(qrCodeImage, "png", outputStream);

        return outputStream.toByteArray();
    }

    public static void generateQRCodeImage(String codeText, int width, int height, String filePath) throws Exception {
        QRCodeWriter qrCodeWriter = new QRCodeWriter();
        BitMatrix bitMatrix = qrCodeWriter.encode(codeText, BarcodeFormat.QR_CODE, width, height);

        BufferedImage qrCodeImage = new BufferedImage(width, height, BufferedImage.TYPE_INT_RGB);
        qrCodeImage.createGraphics();

        for (int x = 0; x < width; x++) {
            for (int y = 0; y < height; y++) {
                qrCodeImage.setRGB(x, y, bitMatrix.get(x, y) ? 0x000000 : 0xFFFFFF);
            }
        }

        ImageIO.write(qrCodeImage, "png", new File(filePath));
    }
}

In the above code, you can see we have specified the
path “./src/main/resources/QRCode.png” where the QR Code Image will get save.
Step 5: Run the Application
Right-click on the project in Spring Tool Suite.
Select "Run As" -> "Spring Boot App" to run the application.
Usage:
To generate and download a QR code, use the following URL in your web browser or Postman.
Run this below link on browser;
http://localhost:8080/generateAndDownloadQRCode/code/350/350
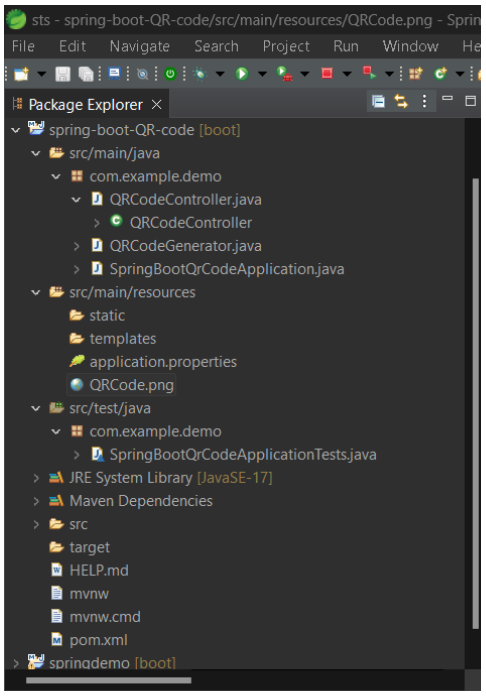
Now go inside the path src/main/resources and Right Click –> refresh the folder, you will able to see the QR Code Image saved with named QRCode.png
Output:

About the Author

Silan Software is one of the India's leading provider of offline & online training for Java, Python, AI (Machine Learning, Deep Learning), Data Science, Software Development & many more emerging Technologies.
We provide Academic Training || Industrial Training || Corporate Training || Internship || Java || Python || AI using Python || Data Science etc


PreviousNext
Join our newsletter for the latest updates.
About us
Our Services
Contact Us
Our Courses
Learn Python | Learn AI | Learn Machine Learning | Learn Deep Learning | Learn Core Java | Learn Java JSP | Learn Java Servlet | Learn Java Spring Core | Learn Spring Boot | Learn Power BI | Learn DAA | Learn HTML | Learn SQL | Learn C Programming | Learn Bootstrap | Learn Git | Learn JavaScript | Learn Data Structure Using C | Learn RDBMS | Learn Data Science | Learn PHP
Our Tutorials
Python Tutorial | AI Tutorial | Machine Learning Tutorial | Deep Learning Tutorial | Core Java Tutorial | Java JSP Tutorial | Java Servlet Tutorial | Java Spring Tutorial | Spring Boot Tutorial | Power BI Tutorial | DAA Tutorial | HTML Tutorial | SQL Tutorial | C Programming Tutorial | Bootstrap Tutorial | Git Tutorial | JavaScript Tutorial | Data Structure Using C Tutorial | RDBMS Tutorial | Data Science Tutorial | PHP Tutorial
Copyright © 2023 Pythontpoint Powered by Silan Software Pvt. Ltd. All rights reserved.