

JAVA Spring Boot Demo Application in Spring Tool Suite Environment
In this article, I have shown how to start to develop first spring boot application. Here I have taken STS as my IDE.
This is my project structure.
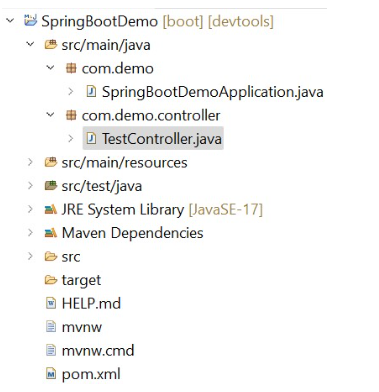
I have added two dependencies like spring web and spring devtools.
Now we will see pom.xml file
<?xml version="1.0" encoding="UTF-8"?>
<project xmlns="http://maven.apache.org/POM/4.0.0"
xmlns:xsi="http://www.w3.org/2001/XMLSchema-instance"
    xsi:schemaLocation="http://maven.apache.org/POM/4.0.0
https://maven.apache.org/xsd/maven-4.0.0.xsd">
    <modelVersion>4.0.0</modelVersion>
    <parent>
        <groupId>org.springframework.boot</groupId>
        <artifactId>spring-boot-starter-parent</artifactId>
        <version>3.1.0</version>
        <relativePath/> <!-- lookup parent from repository -->
    </parent>
    <groupId>com.demo</groupId>
    <artifactId>SpringBootDemo</artifactId>
    <version>0.0.1-SNAPSHOT</version>
    <name>SpringBootDemo</name>
    <description>first spring boot demo application</description>
    <properties>
        <java.version>17</java.version>
    </properties>
    <dependencies>
        <dependency>
            <groupId>org.springframework.boot</groupId>
            <artifactId>spring-boot-starter-web</artifactId>
        </dependency>
        <dependency>
            <groupId>org.springframework.boot</groupId>
            <artifactId>spring-boot-devtools</artifactId>
            <scope>runtime</scope>
            <optional>true</optional>
        </dependency>
        <dependency>
            <groupId>org.springframework.boot</groupId>
            <artifactId>spring-boot-starter-test</artifactId>
            <scope>test</scope>
        </dependency>
    </dependencies>
    <build>
        <plugins>
            <plugin>
                <groupId>org.springframework.boot</groupId>
                <artifactId>spring-boot-maven-plugin</artifactId>
            </plugin>
        </plugins>
    </build>
</project>
Then we will see SpringBootDemoApplication.java
package com.demo;
import org.springframework.boot.SpringApplication;
import org.springframework.boot.autoconfigure.SpringBootApplication;

@SpringBootApplication
public class SpringBootDemoApplication {

    public static void main(String[] args) {
        SpringApplication.run(SpringBootDemoApplication.class, args);
    }

}
Basically we say this is main class file. The annotation @SpringBootApplication representing then entire application is a spring boot application.
Many Spring Boot developers like their apps to use auto-configuration, component scan and be able to define extra configuration on their "application class". A single @SpringBootApplication annotation can be used to enable those three features, that is:
- • @EnableAutoConfiguration: enable Spring Boot’s auto-configuration mechanism
- • @ComponentScan: enable @Component scan on the package where the application is located (see the best practices)
- • @Configuration: allow to register extra beans in the context or import additional configuration classes
The @SpringBootApplication annotation is equivalent to
using @Configuration, @EnableAutoConfiguration, and @ComponentScan with their
default attributes, as shown in the following example:
package com.example.myapplication;
import org.springframework.boot.SpringApplication;
import org.springframework.boot.autoconfigure.SpringBootApplication;

@SpringBootApplication // same as @Configuration @EnableAutoConfiguration
@ComponentScan
public class Application {

    public static void main(String[] args) {
        SpringApplication.run(Application.class, args);
    }

}
Now we will develop a controller file let TestController.java
package com.demo.controller;
import org.springframework.stereotype.Controller;
import org.springframework.web.bind.annotation.RequestMapping;
import org.springframework.web.bind.annotation.ResponseBody;

@Controller
@ResponseBody
public class TestController {
    @RequestMapping("/silan")
    public String sayHi()
    {
        return "this is simple spring boot test application";
    }
}
Code Explanation:
@Controller represents that the class TestController is a controller component. That means the class TestController serves the roll of controller.
@ResponseBody annotation is used to convert your object into HTTP response in the form client is expecting like JSON, XML, or simply text.
@RequestMapping annotation is used to map web requests onto specific handler classes and/or handler methods. @RequestMapping can be applied to the controller class as well as methods.
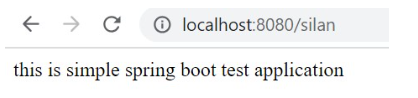
In @RequestMapping annotation we have specified /silan as parameter that means when we will run with localhost:8080, at that time we will pass this parameter like localhost:8080/silan, then sayHi() definition will execute.
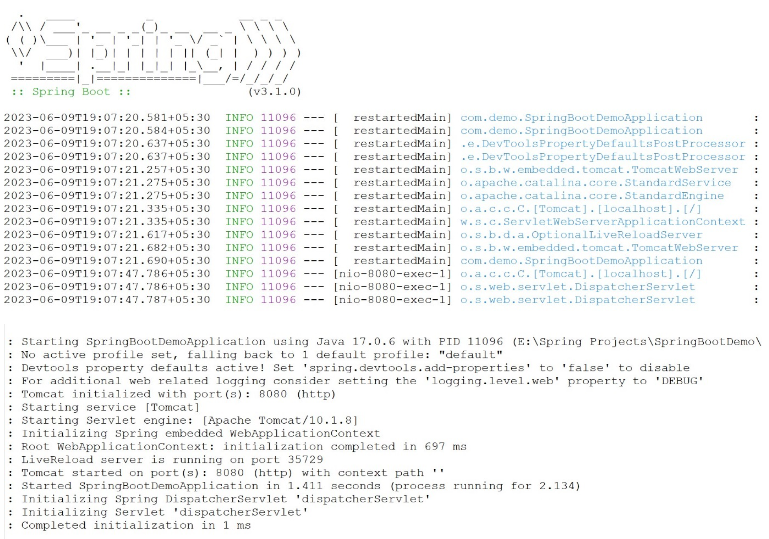
Now we will run SpringBootDemoApplication.java, we will get the following output
Then you open a browser and enter this url http://localhost:8080/silan
About the Author

Silan Software is one of the India's leading provider of offline & online training for Java, Python, AI (Machine Learning, Deep Learning), Data Science, Software Development & many more emerging Technologies.
We provide Academic Training || Industrial Training || Corporate Training || Internship || Java || Python || AI using Python || Data Science etc


PreviousNext
Join our newsletter for the latest updates.
About us
Our Services
Contact Us
Our Courses
Learn Python | Learn AI | Learn Machine Learning | Learn Deep Learning | Learn Core Java | Learn Java JSP | Learn Java Servlet | Learn Java Spring Core | Learn Spring Boot | Learn Power BI | Learn DAA | Learn HTML | Learn SQL | Learn C Programming | Learn Bootstrap | Learn Git | Learn JavaScript | Learn Data Structure Using C | Learn RDBMS | Learn Data Science | Learn PHP
Our Tutorials
Python Tutorial | AI Tutorial | Machine Learning Tutorial | Deep Learning Tutorial | Core Java Tutorial | Java JSP Tutorial | Java Servlet Tutorial | Java Spring Tutorial | Spring Boot Tutorial | Power BI Tutorial | DAA Tutorial | HTML Tutorial | SQL Tutorial | C Programming Tutorial | Bootstrap Tutorial | Git Tutorial | JavaScript Tutorial | Data Structure Using C Tutorial | RDBMS Tutorial | Data Science Tutorial | PHP Tutorial
Copyright © 2023 Pythontpoint Powered by Silan Software Pvt. Ltd. All rights reserved.